Wireless Lavalier Mic: Noise-Cancel Audio for Any Device
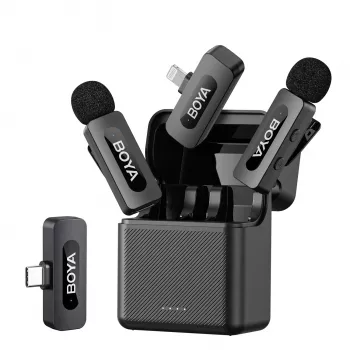
Wireless Lavalier Lapel Microphone with Noise Cancellation for iPhone, Android, and Camera Recording
Clear voice audio can transform mobile videos, interviews, livestreams, and on-the-go shoots—especially in noisy rooms or outdoors. A wireless lavalier microphone makes it easier to capture consistent speech while keeping the phone or camera at a comfortable distance for framing. With a clip-on mic positioned close to the speaker, you’ll usually get a more natural, “present” voice than you can from built-in mics across a room.
What a Wireless Lavalier Microphone Solves
Wireless lavalier (lapel) mics are designed for speaking voice first. Instead of relying on a phone mic that changes tone as you move, a lav mic stays in a predictable spot.
- Keeps speech levels steady even when the speaker turns their head or moves around
- Reduces room echo and background distractions by placing the mic close to the mouth
- Eliminates long cables that snag, limit movement, or clutter a setup
- Improves clarity for talking-head videos, walk-and-talk shots, demos, and interviews
If you’ve ever recorded a product demo and noticed the voice dropping whenever you looked down at the item, a lapel mic is a straightforward fix: the distance from mouth to mic stays consistent.
Noise Cancellation: What to Expect in Real Spaces
Noise cancellation on compact wireless mics typically helps reduce steady background noise and makes voice stand out more clearly, but it won’t “erase” a chaotic environment. The biggest improvement still comes from placement and sensible recording levels.
- Background reduction works best when the mic is correctly positioned (typically 6–8 inches below the mouth on the chest)
- Wind and clothing friction are common problems; secure the mic and avoid rubbing fabric against the capsule
- If the environment is very loud (traffic, gym music), get closer to the speaker and lower the recording gain when possible
- Room tone can still be present; use soft furnishings or move away from reflective walls for cleaner sound
For practical placement and clothing-noise basics, Shure’s lavalier guidance is a helpful reference: Shure — How to Use a Lavalier Microphone.
Compatibility With iPhone, Android, and Cameras
Before recording day, confirm how your device accepts external audio. The most common issues come down to connector type, adapter needs, and app behavior.
- Phones: Confirm the connector type required for the device (Lightning, USB‑C, or 3.5 mm) and whether an adapter is needed
- Android: USB‑C audio support varies by model and app; test with the intended camera app before a live session
- Cameras: Many cameras require a 3.5 mm mic input; verify the camera’s mic-in port and settings (external mic enabled, levels set appropriately)
- Apps: Some apps apply automatic gain control; if available, disable auto gain and set levels manually for more natural results
Quick Compatibility Checklist
| Device | What to check | Common fix if it doesn’t work |
|---|---|---|
| iPhone | Lightning/USB‑C port type and permissions | Use the correct adapter; replug and allow accessory access |
| Android phone | USB‑C audio input support and app selection | Try a different app; toggle USB audio routing if available |
| DSLR/Mirrorless camera | 3.5 mm mic input and mic level settings | Enable external mic; adjust input gain; monitor with headphones if supported |
| Tablet/Laptop | USB audio recognition and input selection | Select the microphone in system audio settings |
For iPhone accessory/adapter considerations, Apple’s support documentation can be useful: Apple Support — Connect accessories with iPhone. For deeper background on USB audio behavior on Android, see: Android Developers — USB audio.
Setup in Minutes: Placement and Pairing Habits That Matter
Small changes in placement and handling often make a bigger difference than any setting. Build a simple pre-record routine and you’ll get consistent results across different rooms and shoots.
- Clip placement: center chest is a reliable default; keep the capsule unobstructed
- Cable management: make a small loop under the clip to reduce tugging and clothing noise
- Distance: close mic placement lets you keep the phone/camera farther away for a better shot without losing intelligibility
- Monitoring: whenever possible, do a 10–15 second test recording and listen back before the full take
When testing, listen specifically for “scratchy” fabric noise, sudden volume jumps, and popping consonants. A quick reposition—slightly off-center or a bit higher—often solves it immediately.
Everyday Use Cases
Care, Troubleshooting, and Better Audio Fast
Product Option Available Now
- Wireless Lavalier Lapel Microphone with Noise Cancellation for iPhone Android Camera (in stock)
- Suitable for creators who need mobility, clearer dialogue capture, and a simpler recording workflow across devices
- Confirm the correct connector/adapter for the intended phone or camera before shooting day
- Break the Tension: Stress Relief Techniques – Breathing Exercises, Quick Meditations, Grounding Techniques, and Time Management Tips to Reduce Stress
- Step-by-Step Career Development Guide – Professional Growth, Job Search, Networking & Resume Writing Ebook
FAQ
Will a wireless lavalier microphone work with both iPhone and Android?
It can, but compatibility depends on the connector type (Lightning, USB‑C, or 3.5 mm), whether an adapter is required, and whether the phone and recording app support external audio input. Test with the exact app you plan to use before a live shoot.
Does noise cancellation remove background sounds completely?
No—noise cancellation usually reduces steady or moderate background noise, but it can’t fully eliminate loud environments like traffic or music. The best results come from close placement, wind/clothing control, and keeping recording levels sensible.
How do you stop clothing rustle when using a lapel mic?
Clip the mic where fabric won’t rub, keep the capsule unobstructed, and make a small strain-relief loop so movement doesn’t tug the mic. Avoid necklaces, zippers, and scarves near the mic, and do a short test recording to confirm the placement.


Leave a comment