USB Cardioid Mic Kit + Boom Arm: Cleaner Streams
USB Cardioid Condenser Microphone Kit with Boom Arm for Streaming & Recording
A plug-and-play USB cardioid condenser microphone kit can raise the clarity of streams, voice chats, podcasts, and home recordings without adding complicated audio gear. With a boom arm for positioning and a cardioid pickup pattern designed to focus on what’s in front of the mic, this type of setup helps capture a clean voice while keeping room noise and keyboard clatter more controlled. For more guidance, see The RPG Beginner’s Guide to Microphones, Cameras, and Streaming.
If you’re upgrading from a laptop mic or a headset, a kit like the USB Cardioid Condenser Microphone Kit with Boom Arm for Streaming & Recording is a straightforward way to get closer, more present voice audio—especially when you pair good placement with a few light software tweaks. For further reading, see Best Podcast Starter Kits (Any Number Of Mics) – PodcastHosting.org.
What This Microphone Kit Is Best For
- Live streaming: clearer spoken voice for gaming, commentary, and IRL streams when placed close and aimed correctly.
- Voice recording: narration, voiceovers, and online course audio with consistent tone and reduced room reflections compared to distant miking.
- Video calls and remote work: improved intelligibility versus laptop mics, especially in shared spaces.
- Entry-level music capture: scratch vocals, acoustic instruments, and demos (best results in quieter rooms and with careful placement).
- Beginner-friendly setup: USB connection avoids the need for an audio interface, XLR cables, and phantom power hardware.
For creators who like keeping a tidy workspace, a boom arm also helps keep your desk surface open for a keyboard, controller, or notes. If you script intros or track talking points, pairing your mic setup with a dedicated notebook like the Elegant PU Leather Journal Notebook with Thick Soft Cover & Elastic Strap can make recording sessions feel more organized without adding screens or distractions.
Why Cardioid Pickup Matters
- Front-focused capture: cardioid patterns emphasize sound from the front of the capsule, helping the voice stand out.
- Reduced side and rear pickup: can help lower fan noise, room ambience, or other off-axis sounds when the mic is oriented properly.
- Consistency tip: keep the mic’s front aimed at the mouth; speaking into the side (common mistake) can make audio thin and quiet.
- Room control still counts: cardioid reduces unwanted sound, but it does not eliminate reflections; soft furnishings and closer placement usually improve results.
Pickup patterns can feel abstract until you hear the difference. A cardioid mic is most sensitive in front and less sensitive behind, so placement becomes your “first EQ.” For deeper background on placement basics and pattern behavior, Shure’s general guidance is a helpful reference: Shure — Microphone Techniques. For a quick explanation of what “cardioid” means in practical terms, this overview is also useful: Adobe — What is a cardioid microphone pattern?.
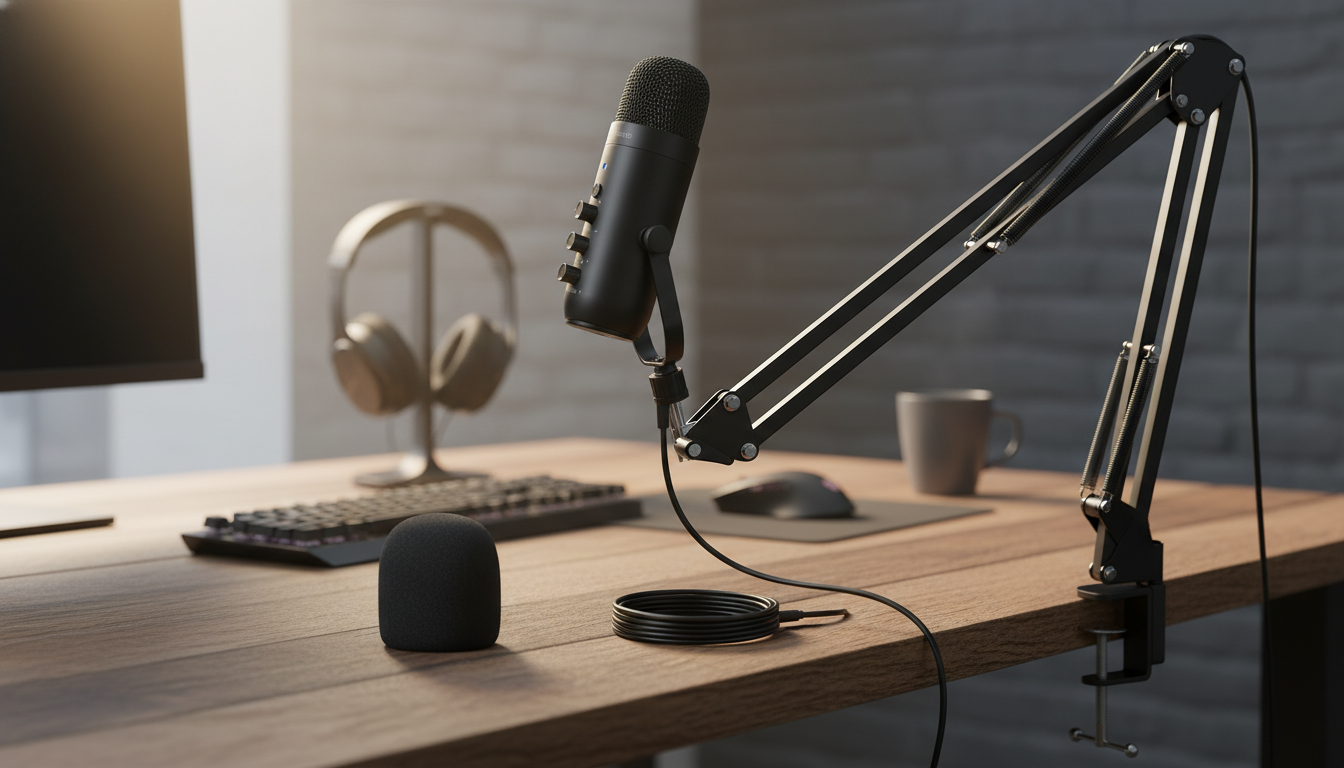
Boom Arm Placement for Cleaner Sound
- Distance: start around 6–10 inches from the mouth; closer placement increases voice presence and reduces room noise.
- Angle: place the mic slightly off-center (about 20–45 degrees) to reduce plosives while keeping clarity.
- Height: aim the mic at the corner of the mouth, not directly in front of the lips, to minimize breath blasts.
- Desk vibrations: keep the arm joints tight; route the cable so it doesn’t tug or transmit knocks.
- Noise control: position the mic so the keyboard is off-axis (to the side) rather than directly behind the mic’s front.
A simple way to “find” the cardioid advantage is to treat the front of the mic like a flashlight beam: point it at your mouth, and point the “dark side” toward whatever you want quieter (often a keyboard or a PC fan). Then move the mic closer before raising gain—most of the time, this single change reduces noise more naturally than heavy processing.
Quick Setup Checklist (USB to Recording or Streaming)
What’s Typically Included in the Kit and What Each Part Does
Kit Components and Practical Benefits
| Component | What it helps with | Setup tip |
|---|---|---|
| USB condenser microphone | Clear voice capture and easy connection | Aim the front of the mic toward the mouth |
| Boom arm | Flexible placement and reduced desk clutter | Tighten joints so the mic doesn’t drift |
| Pop filter / windscreen | Fewer plosives and breath hits | Place 1–2 inches from the mic, not touching it |
| Shock mount | Less thump from bumps and typing vibrations | Avoid letting the cable rub against the mount |
| USB cable | Stable power/data connection | Plug into a direct USB port if possible |
Sound Tuning Tips That Make a Big Difference
Care, Durability, and Daily Use
FAQ
Will a USB condenser microphone work with streaming apps without extra hardware?
Yes—on most Windows and Mac computers it’s plug-and-play, and you simply select the USB mic as your input in system settings and apps like OBS, Streamlabs, or Discord. Consoles and some mobile setups may require adapters or may not support every USB microphone reliably.
How far should the microphone be from the mouth for streaming?
Start around 6–10 inches and adjust closer if you hear too much room sound. Speaking slightly off-axis and using a pop filter or windscreen helps reduce plosives while keeping your voice clear.
How can keyboard and mouse noise be reduced with a cardioid mic?
Position the keyboard off to the side of the mic (off-axis), then move the mic closer so you can lower gain. A shock mount, a stable boom arm, and light noise suppression or a carefully set noise gate can further reduce clicks and desk vibrations.


Leave a comment